CALL US NOW
Concrete steps can withstand considerable wear and tear; however, over time even the sturdiest steps can begin to show signs of deterioration. Factors such as weather conditions, frequent use, and the passage of time can lead to issues like cracks, chips, and the erosion of the concrete surface. Regular maintenance of concrete steps not only extends their lifespan but also ensures safety for those who use them.
Homeowners and handymen often consider concrete step repair a manageable DIY project. It requires a careful approach to remove damaged concrete, prepare the surface, and apply a patching compound. Though it is economical compared to a full replacement, repairing concrete steps demands precision and adherence to the correct procedure to ensure the fix is both effective and long-lasting.
Accurate preparation of the damaged area and the use of appropriate materials contribute to a successful repair. Depending on the extent of the damage, different methods are implemented. For minor surface problems, resurfacing might suffice, while more significant issues may require the reconstruction of corners or entire steps. Knowledgeable individuals approach concrete step repair methodically, restoring the structure’s integrity while maintaining its original appearance.
Assessing Step Damage

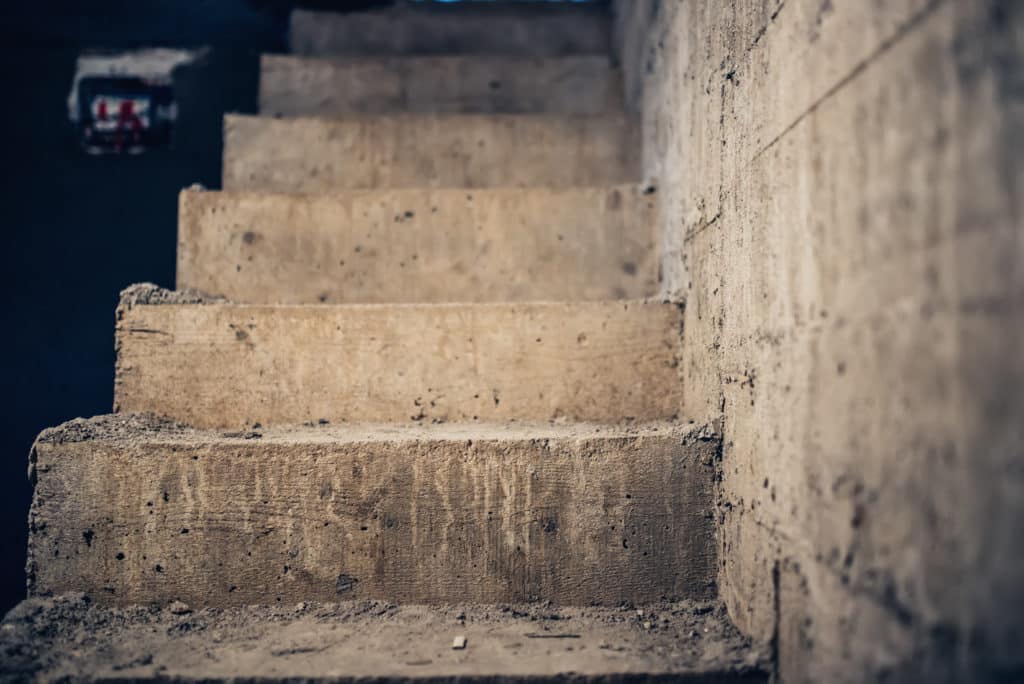
Before attempting repairs, it is crucial to carefully examine concrete stairs for damage. This initial evaluation determines the correct approach for restoration, ensuring the structure’s safety and longevity.
Identify Damage Types
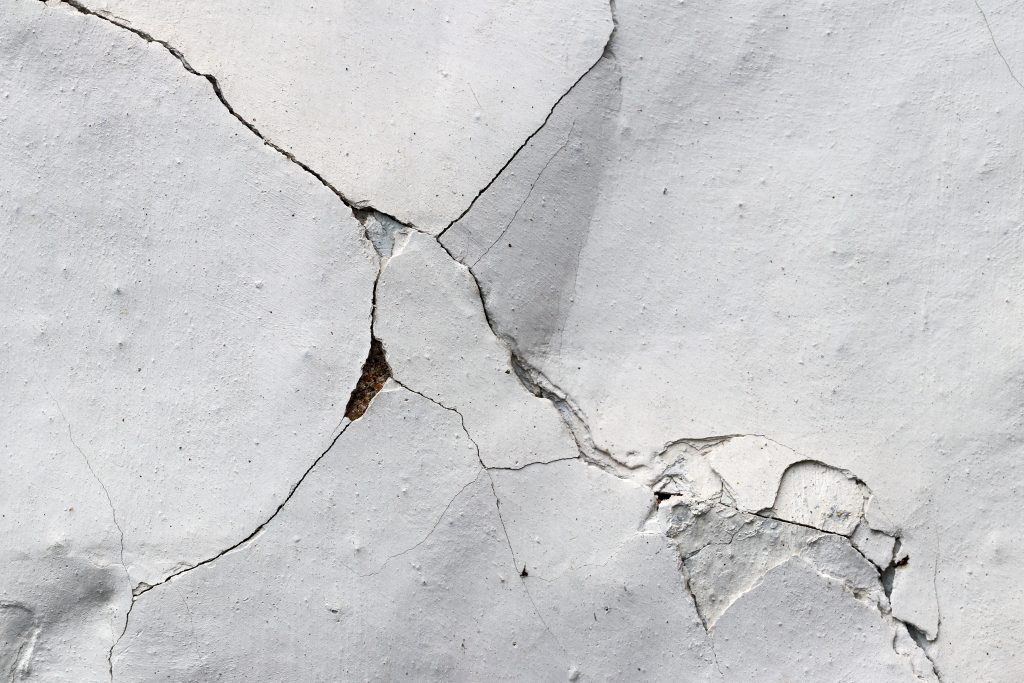
Concrete steps may suffer from various forms of damage. Surface deterioration often manifests as chipping or flaking, usually due to weather exposure or de-icing chemicals. Deep cracks signify more severe stress, potentially compromising the steps’ integrity. Recognizing whether the damage is superficial or structural is pivotal for planning the appropriate repair strategy.
Determine Repair Scale
Evaluating the scale of repair involves estimating the damage extent to prepare for the necessary work and materials. For minor damage, such as hairline cracks, a simple patching job might suffice. However, significant damage—like large, deep cracks or portions of stair missing—transforms the project into a major repair task that may pose a safety hazard if not addressed promptly and correctly.
Preparation for Repair
Before attempting any concrete step repair, proper preparation is critical to ensure that the repair bonds effectively and lasts. It involves cleaning the area thoroughly and gathering all necessary tools and materials.
Cleaning the Area
To start, one must make sure that the damaged concrete area is completely clean. This involves removing any loose debris with a chisel and using a wire brush to scrub the area vigorously. For more stubborn or hard-to-reach dust and particles, employing a shop vac can be particularly effective. If available, pressure washing can provide an even deeper clean, but it’s crucial to let the concrete dry completely before proceeding with repairs.
Setting Up Tools and Materials
A successful repair requires a well-organized work area with all the necessary tools and materials within easy reach. One should assemble:
- Chisel and hammer: For removing damaged concrete and shaping the area before the repair.
- Wire brush: To clean the repair area.
- Shop vac: For a thorough cleanup of dust and small particles.
- Bucket: For mixing concrete repair material.
- Trowel: To apply and smooth the concrete repair material.
- Repair materials: Depending on the extent of damage, this could include concrete patch compound, bonding agent, or epoxy filler for the repair.
Ensuring that these tools and materials are ready before beginning the repair will streamline the process, allowing for a swift and effective application.
Repairing the Steps
When repairing concrete steps, it’s crucial to begin with a stable foundation and use the right materials for a durable finish. Careful preparation of the damaged area and the judicious use of materials will ensure a successful repair.
Applying Concrete Bonding Adhesive
Before applying the patching compound, it’s important to create a strong bond between the existing concrete and the repair material. First, clean the steps thoroughly to remove any loose debris. One can use a stiff wet brush to accomplish this, and if necessary, a pressure washer for tough grime. Then, apply a concrete bonding adhesive over the steps, ensuring it’s spread evenly for a seamless hold. Allowing the adhesive to become tacky before applying the patch is essential for a strong bond.
Mixing and Applying Concrete Patch
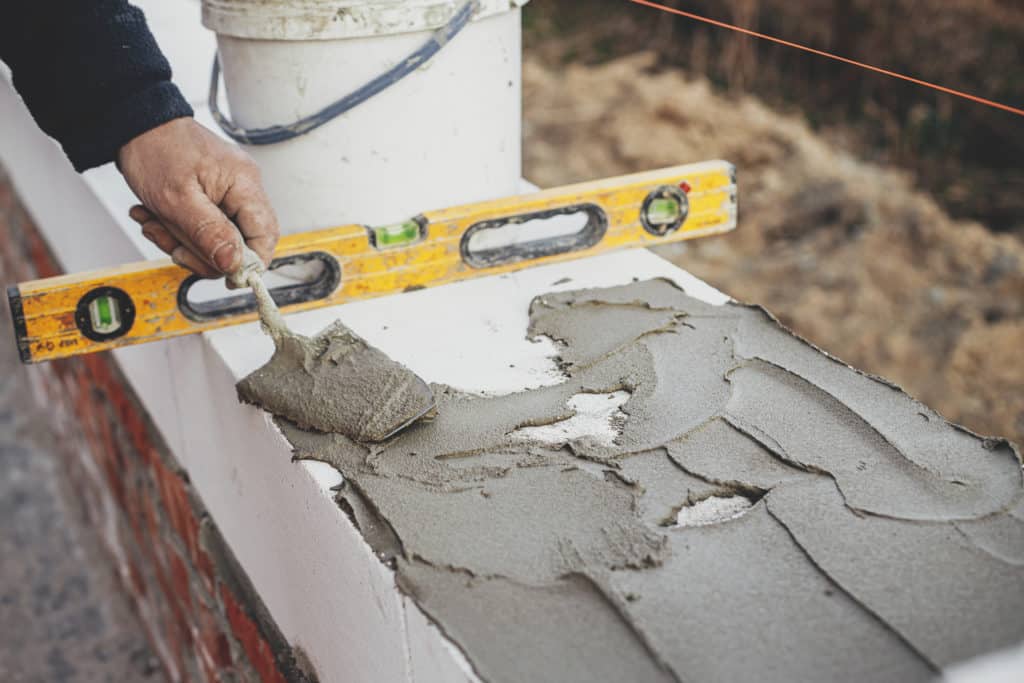
With the surface prepped and the adhesive in place, it’s time to mix the concrete patching compound. The mixture should have a thick, paste-like consistency to facilitate application with a steel trowel. If working with quick-setting cement, it’s important to work swiftly to apply the mixture before it begins to set. Use the steel trowel to press the compound into the damage and to sculpt the shape of the step, ensuring a smooth finish with a level. For larger repairs, a wood form may be required to hold the shape while the compound sets. Once the repair is shaped as desired, use a sponge to lightly texture the surface, blending the repaired area with the existing step.
Finishing Touches

Once the concrete patch is applied, the final steps ensure longevity and aesthetic appeal. Proper smoothing, curing, and sealing are critical for a lasting repair.
Smoothing and Shaping
Using a masonry brush or a float, an individual smooths the surface of the fresh concrete patch to match the surrounding area. If edges are involved, a concrete edger is beneficial to shape the sides and ensure a professional finish. Any excess can be wiped away with a damp rag.
Curing and Sealing
The new concrete requires proper curing to achieve its full strength. It should remain moist; one might cover the area with plastic sheeting or apply moisture via a spray bottle intermittently. After curing, a concrete sealer is applied to protect the surface from moisture penetration and weather conditions. For better adhesion, the area can be bordered with duct tape prior to sealing to keep edges clean and sharp.
Maintenance and Prevention
Maintaining concrete steps is essential to prolong their lifespan and ensure safe usage, while also being a cost-effective strategy in the long term. Protection against the elements and regular upkeep can prevent the need for extensive concrete repairs.
Regular Cleaning and Inspection
Regular cleaning and inspection are the first lines of defense in maintaining concrete steps. They should sweep away debris and dirt and check for any signs of wear or damage. It’s important to:
- Inspect for cracks, chips, and signs of sunken steps which may indicate structural issues.
- Clean with mild detergent or concrete cleaner to remove stains and buildup.
For areas with mold, moss, or mildew, a solution of bleach and water can be applied. This regular maintenance can prevent minor issues from escalating into major concrete step repairs.
Applying Protective Sealant
Applying a protective sealant is a critical preventive measure for concrete steps. A quality sealer:
- Extends the life of the concrete by protecting it from moisture and wear.
- Reduces maintenance costs over time since well-sealed steps resist damage from weather and traffic.
The application of a concrete sealer should occur when the steps are dry and clean, generally a month after any concrete repairs to allow proper curing. This will ensure they remain in good condition and are shielded against harsh weather conditions and erosion.
Cost and Hiring Professionals
When considering concrete step repair, homeowners must weigh the cost-effectiveness of DIY approaches against hiring professionals. Safety is paramount, so hiring a skilled handyman may be the prudent choice for complex repairs.
DIY vs. Professional Repair
Homeowners may tackle minor cracks or cosmetic issues in concrete steps on their own, potentially saving money on labor costs. Simple patching kits can be cost-effective for small-scale repairs. However, larger repairs often present safety hazards and may require a variety of specialized tools. Experts bring a level of precision and safety to the project that DIY may not achieve, and the additional cost can be justified by the longevity and stability of the repair.
Estimating Repair Costs
To estimate the repair costs, homeowners should consider the extent of damage and the repair scope. A professional contractor typically charges between $100 and $300 per hour. Total costs can vary widely, influenced by factors such as the number of steps, materials needed, and regional labor rates. A simple repair might be on the lower end of the spectrum, while extensive reconstruction could approach or exceed $3,000. A detailed quote can be obtained from professionals, who can assess the project and provide clear pricing. To ensure the project remains cost-effective, it’s recommended to get multiple estimates.
- Minor Repairs: $100 – $400
- Major Overhauls: Up to $3,000 or more
For reliable and safe repair work, homeowners are encouraged to find a pro today who can offer the expertise and assurance that the job is done right.