CALL US NOW
Concrete floors are a popular choice for many homeowners and businesses due to their durability and low maintenance. However, plain concrete floors can lack character and style. This is where decorative flakes from Behr can come in to add a unique touch to your concrete floors.
These flakes are easy to apply and can create a variety of patterns and colors to suit your preference. Applying decorative flakes requires careful preparation and attention to detail. It is important to follow the correct steps to ensure a durable and long-lasting finish.
In this article, we will guide you through the process of applying Behr decorative flakes to your concrete floors. We will cover everything from preparing your floors to applying the basecoat, adding the flakes, and sealing them in with a clear topcoat. By following these steps, you can create beautiful and durable decorative floors that will last for years to come.
Preparing Your Concrete Floors for Decorative Flakes
The preparation of concrete floors for decorative flakes involves thorough cleaning, repairing of any cracks, and application of a suitable primer to ensure proper adhesion of the flakes, thereby enhancing the durability and aesthetic appeal of the flooring.
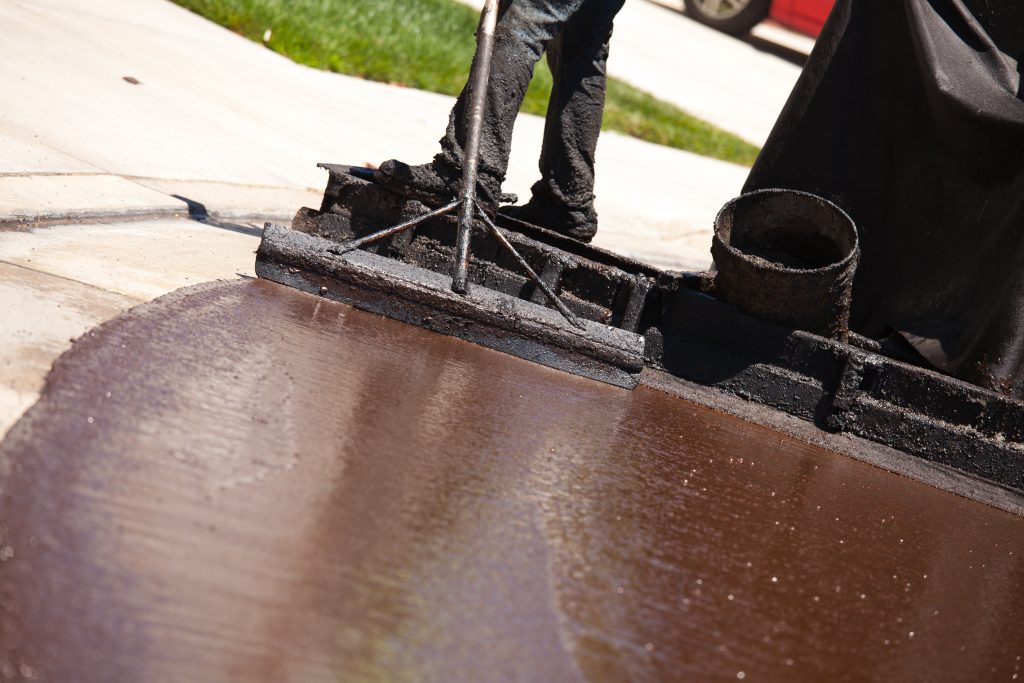
Before applying decorative flakes, it is important to clean the surface of the concrete thoroughly. This can be done by sweeping, vacuuming, or using a pressure washer to remove any dirt, dust, or debris. Additionally, any oil or grease stains must be removed using a degreaser or a solution of water and detergent.
After cleaning the concrete floor, it is important to repair any cracks or imperfections in the surface. This is done to ensure that there are no weak spots in the concrete, which can cause the flakes to come off or the surface to deteriorate over time. Cracks can be repaired using a concrete patching compound, which is applied to the affected area and allowed to dry according to the manufacturer’s instructions.
A suitable primer must be applied to the concrete surface to ensure proper adhesion of the decorative flakes. The primer is typically a two-part epoxy, which is mixed together and applied to the surface using a roller or a brush. The primer must be allowed to dry completely before the decorative flakes are applied.
By following these steps, the concrete surface is properly prepared for the application of decorative flakes, which can enhance the durability and aesthetic appeal of the flooring.
Applying the Basecoat of Behr Premium 1-Part Epoxy Concrete and Garage Floor Paint
To properly prepare the surface for the basecoat of Behr Premium 1-Part Epoxy Concrete and Garage Floor Paint, it is crucial to thoroughly clean and etch the concrete substrate.
The first step is to sweep the floor to remove any loose debris, followed by the use of a degreaser to eliminate any oil or grease stains. Afterward, the surface must be thoroughly rinsed with water and allowed to dry completely.
Once dry, the concrete must be etched using Behr Premium Concrete and Masonry Etcher. The etcher must be applied in a uniform manner and allowed to sit on the surface for at least 15 minutes to ensure proper penetration.
After the etching process, the surface must again be thoroughly rinsed with water and allowed to dry completely. Once dry, the basecoat may be applied using Behr Premium 1-Part Epoxy Concrete and Garage Floor Paint.
It is important to note that the basecoat must be applied in a consistent and even manner to ensure proper coverage, and it is recommended to use a roller brush for application. The basecoat should be allowed to dry for a minimum of 24 hours before the decorative flakes are added.
The proper application of the basecoat is crucial for the success of the overall decorative flakes application process. It is imperative to follow the recommended steps for preparing the concrete surface, including thorough cleaning and etching, to ensure proper adhesion and longevity of the paint.
Once the basecoat is applied, it must be allowed to dry completely before proceeding with the decorative flakes application.
Applying the Decorative Flakes in Your Desired Pattern and Density
Achieving a unique and visually appealing pattern and density of decorative flakes on a painted garage or concrete floor involves a strategic placement method that enhances the overall aesthetic and durability of the surface.
To begin, carefully pour the flakes onto the wet paint surface, making sure to spread them evenly across the entire area. Use a flake dispenser to control the amount of flakes and avoid clumping.
Once the flakes are distributed, allow the surface to dry completely before removing any excess flakes with a stiff-bristled brush or broom. This step is crucial in ensuring that the flakes are properly embedded into the paint and will not come loose over time.
It’s important to note that the density of the flakes can be adjusted to achieve your desired level of coverage.
To create a unique pattern, consider using multiple colors of flakes or arranging them in specific shapes or designs. Some popular patterns include a random scatter, a border around the edges of the room, or a geometric shape in the center of the floor.
With a little creativity and attention to detail, the possibilities for creating a customized and durable decorative floor are endless.
Sealing in the Flakes with a Clear Topcoat
Sealing the decorative floor with a clear topcoat enhances its durability and protects the flakes from wear and tear. After the flakes have been applied in your desired pattern and density and the coat of epoxy has cured, it is time to apply the topcoat. The topcoat is a clear layer of protective coating that seals in the flakes and provides a glossy finish to the floor.
Before applying the topcoat, ensure that the floor is clean and free of any debris. Any dirt or dust on the surface may cause the topcoat to adhere poorly and result in a rough finish. Use a vacuum cleaner or a dust mop to remove any loose particles from the surface. If there are any stains or stubborn dirt marks, clean them with a degreaser or a mild detergent. Allow the floor to dry completely before proceeding with the application of the topcoat.
To apply the topcoat, use a roller or a sprayer. Apply the coat evenly, starting from one end of the room and working your way towards the other end. Avoid over-applying the topcoat as it may result in a cloudy finish. Allow the topcoat to dry for at least 24 hours before walking on the floor.
Once the topcoat has cured, the floor will be ready to use. With the addition of the topcoat, the decorative flakes will be protected from scratches and fading, ensuring that your floor looks as good as new for years to come.
Maintaining Your Beautiful and Durable Decorative Floors
Maintaining the durability and beauty of your decorative floors requires regular cleaning and upkeep using appropriate cleaning tools and products. One of the most important things to keep in mind is to avoid using harsh chemicals or abrasive cleaners that can damage the surface of your floor.
Instead, use a mild detergent solution and a soft-bristled brush or mop to clean your floor regularly. For tough stains or dirt, you can use a specialized cleaner designed for use on decorative concrete floors.
In addition to regular cleaning, it is also important to protect your floor from damage by using furniture pads under heavy items and avoiding dragging heavy objects across the surface. You should also avoid using sharp objects or high heels on your decorative floor, as they can cause scratches or scuffs. If you have pets, it’s a good idea to keep their nails trimmed to prevent them from scratching the surface of your floor.
You should have your decorative floor professionally resealed every few years to maintain its durability and protect it from wear and tear. A professional sealing service will ensure that your floor is properly cleaned and sealed with a high-quality sealer that is designed to protect against stains, UV rays, and other types of damage.
By following these simple maintenance tips, you can enjoy the beauty and durability of your decorative concrete floor for many years to come.
Frequently Asked Questions
Can Behr Concrete Floor Decorative Flakes be used on outdoor concrete surfaces?
Behr concrete floor decorative flakes are designed to be used on indoor concrete surfaces that are properly prepared and primed. While they may be able to withstand some outdoor exposure, it is not recommended to use them on outdoor concrete surfaces due to the potential for weather and UV damage.
Additionally, the flakes are not designed to provide the same level of slip resistance as outdoor concrete coatings, which could create a safety hazard. Therefore, it is important to consider the intended use and location of the concrete surface before deciding whether or not to use Behr decorative flakes.
Can Behr Concrete Floor Decorative Flakes be used on previously painted concrete floors?
Behr concrete floor decorative flakes are designed to be used on uncoated concrete surfaces, as they require proper adhesion to the substrate. If the concrete floor has been previously painted, it is recommended to remove the paint and prepare the surface by mechanically abrasion or etching. This will ensure that the flakes adhere properly to the surface and prevent any peeling or flaking.
Additionally, it is important to ensure that the surface is clean and free of any dust, oil, or debris before applying the flakes. It is also recommended to use a primer before applying the flakes, as this will improve the adhesion and durability of the coating. Finally, it is important to follow the manufacturer’s instructions carefully when applying the flakes to achieve the desired result.
How long do I have to wait before walking on my newly applied Behr Concrete Floor Decorative Flakes?
After applying Behr concrete floor decorative flakes, the recommended waiting time before walking on the surface is 24 hours. This allows the flakes to properly adhere to the surface and the coating to fully dry and cure.
It is important to note that the waiting time may vary depending on the temperature and humidity conditions, as higher temperatures and humidity levels can accelerate the drying process.
It is also recommended to avoid placing heavy furniture or objects on the surface for at least 72 hours to ensure optimal curing.
Following these guidelines will help ensure a long-lasting and durable flooring finish.
Can I apply Behr Concrete Floor Decorative Flakes over a rough concrete surface?
Yes, it is possible to apply Behr concrete floor decorative flakes over a rough concrete surface. However, it is important to properly prepare the surface before application to ensure maximum adhesion and durability.
This includes thoroughly cleaning the surface to remove any dirt, debris, or other contaminants, as well as repairing any cracks or other damage. It may also be necessary to grind or sand the surface to create a smoother, more even texture.
Additionally, it is recommended to use a concrete primer before applying the decorative flakes to further improve adhesion and ensure a long-lasting finish. Following these steps can help ensure a successful application of Behr concrete floor decorative flakes over a rough concrete surface.
Can I mix different colors of Behr Concrete Floor Decorative Flakes to create a custom look?
Yes, it is possible to mix different colors of Behr concrete floor decorative flakes to create a custom look.
However, it is important to note that the flakes should be mixed thoroughly to ensure an even distribution of colors.
It is recommended to mix the flakes in a separate container and then sprinkle them onto the wet coating of the base color.
This will allow for a more uniform distribution and prevent clumping.
Additionally, it is important to follow the recommended coverage rate for the flakes to ensure proper adhesion and durability.
It is also important to note that the final color may be slightly different than anticipated due to variations in the base color and the flakes themselves.
Conclusion
Decorative concrete floors can add both beauty and durability to any space, making them a popular choice for homeowners and businesses alike. To achieve the desired look, it’s important to follow a proper application process.
This article has outlined the steps for applying Behr concrete floor decorative flakes.
First, it’s important to properly prepare the concrete surface, ensuring it’s clean and free of any debris or oil stains.
Next, applying the basecoat of Behr Premium 1-Part Epoxy Concrete and Garage Floor Paint is necessary before moving on to applying the decorative flakes in your desired pattern and density.
Finally, sealing in the flakes with a clear topcoat will provide long-lasting protection.
An interesting statistic to consider is that the decorative concrete market is projected to grow at a CAGR of 6.2% from 2020 to 2027, according to a report by Allied Market Research. This growth is largely attributed to the increasing demand for aesthetically pleasing and durable flooring options in various industries.
Following the proper application process for Behr concrete floor decorative flakes can result in a beautiful and long-lasting flooring solution.
If you have additional questions or need the help of a concrete maintenance company to add a flawless application of Behr concrete floor decorative flakes, feel free to reach out to our creative epoxy finish specialists today.