CALL US NOW
Concrete is a durable and versatile building material, commonly used in a variety of construction projects, from sidewalks and driveways to foundations and walls. However, despite its strength, over time, it may develop cracks due to a number of factors, including thermal expansion and contraction, subgrade settlement, and the natural curing process. It’s important to address these cracks promptly to maintain the structural integrity and appearance of concrete surfaces.
Repairing concrete cracks involves careful preparation and choosing the right repair method tailored to the severity of the damage. Small, hairline cracks can often be fixed using a simple concrete repair mix or specialized sealant, while larger cracks may require more extensive approaches, such as filling with a patching compound followed by sealing. Ensuring that loose material and debris are removed from the crack is imperative to achieving a long-lasting repair.
When executed correctly, fixing cracks in concrete not only restores the surface but also prevents further deterioration caused by water infiltration and freeze-thaw cycles. Professionals and DIY enthusiasts alike can tackle concrete crack repair with the right information and tools at hand.
Assessing the Damage
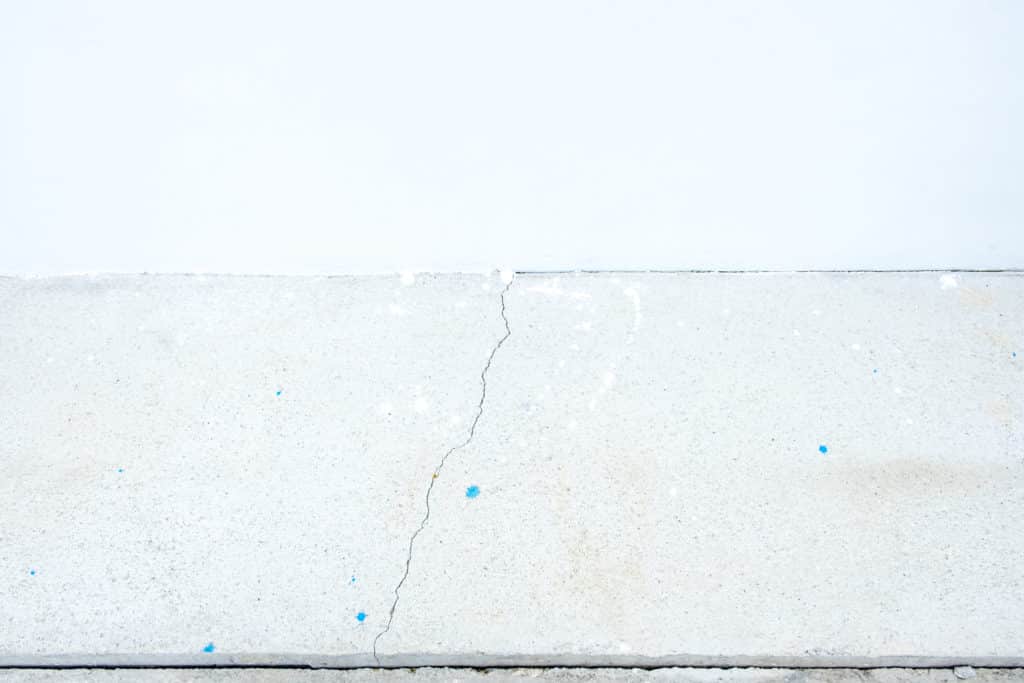
A crucial step in repairing concrete cracks is to thoroughly assess the extent of the damage. This involves identifying the type of crack and determining its depth, which are essential in choosing the appropriate repair method.
Identifying Crack Type
Hairline cracks are thin surface breaks that typically do not affect structural integrity. They may result from minor settling or shrinkage as the concrete cures. Small cracks are slightly larger than hairline cracks but usually still limited to the surface. When cracks progress beyond the surface level and become large cracks or wide cracks, they may present more significant concerns. Horizontal cracks, especially when observed in foundation walls, can indicate serious issues relating to lateral pressure or foundational settlement.
Determining Crack Depth
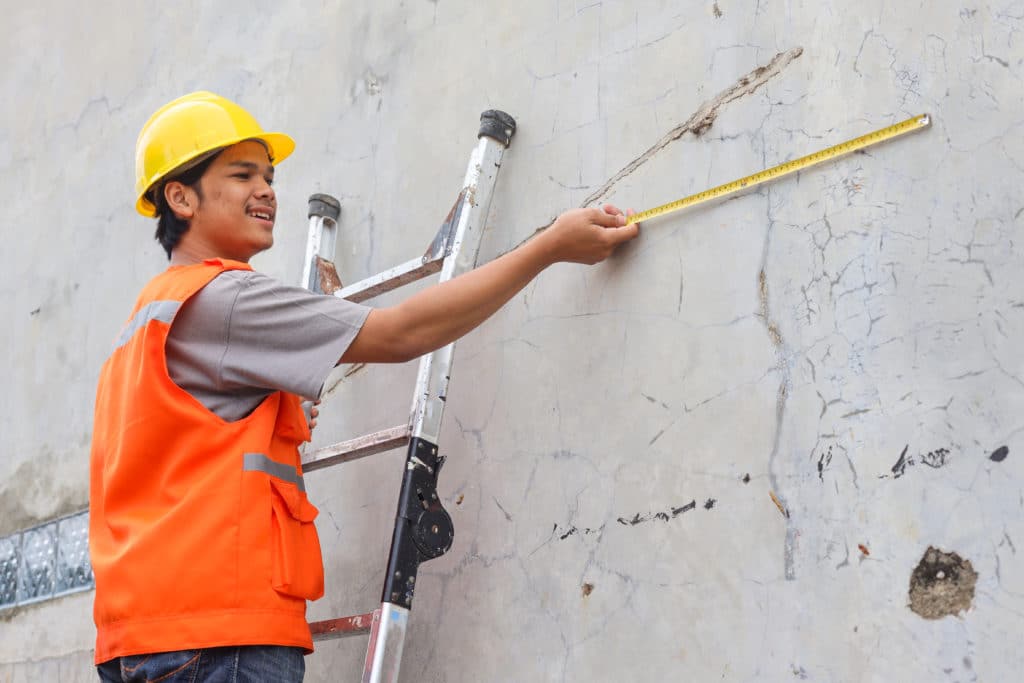
To determine the depth of a crack, a straightforward method is to use a depth gauge. However, in its absence, inserting a thin object like a wire can also provide a rough estimate. Deep cracks extending through the concrete slab or wall can jeopardize the structural integrity of the material. Such damages require immediate attention from professionals, as they can lead to structural failure if not addressed promptly. It is critical to evaluate if the crack penetrates through the full depth of the concrete or remains superficial before proceeding with repairs.
Preparing the Crack for Repair
The first step in ensuring a durable concrete repair is proper preparation of the crack. This involves meticulously cleaning the area and removing any loose material that could compromise the bonding of the repair material.
Cleaning the Crack
One begins by meticulously scrubbing the crack with a wire brush to remove all superficial debris and dust. This action exposes the solid concrete surfaces needed for an effective repair. For deeper cleaning, one might utilize a shop vac to ensure the removal of finer particles of concrete dust that could affect adhesion.
Removal of Loose Material
Carefully using a hammer and chisel, an individual can remove unstable pieces of concrete, a critical step in preventing future deterioration. A trowel can be useful for clearing out the dislodged materials, creating a clean space for the repair compound to be applied. Ensuring all unstable material is eliminated is essential for the longevity of the repair.
The crack must be devoid of all loose particles and clean before proceeding to the actual repair process. These preparation techniques help create the right environment for a strong, lasting concrete bond.
Selecting the Right Repair Material
When tackling concrete repairs, selecting the appropriate material is crucial for both the longevity of the repair and the compatibility with the existing concrete. The objective is to achieve a durable bond that can flex with the concrete’s movement and withstand environmental conditions.
Evaluating Repair Products
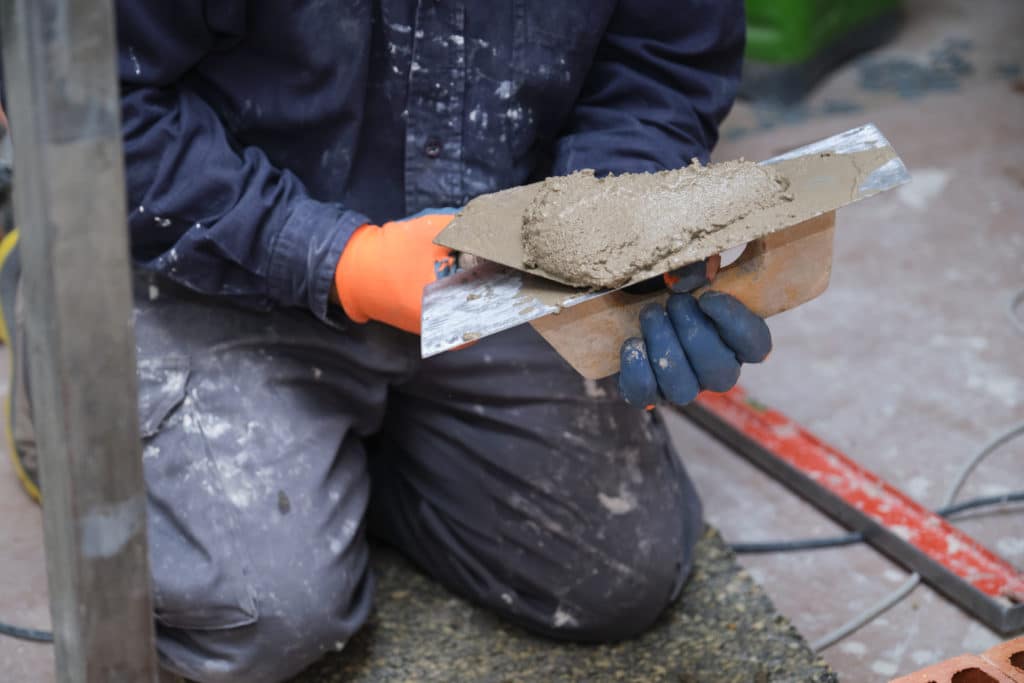
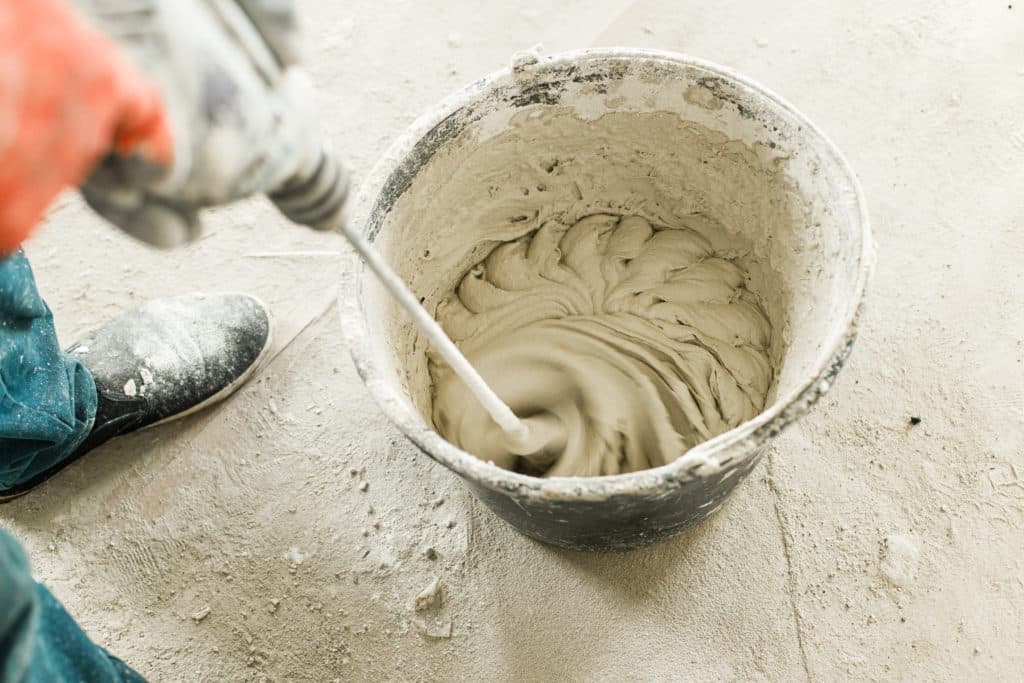
Quick-setting concrete is excellent for small repairs, as it sets rapidly and can be easily mixed in small quantities. It typically contains a mixture of Portland cement, sand, and special additives that give it its quick-setting properties. When dealing with wider cracks, a concrete backer rod can be used to fill the void before applying the repair material, ensuring that less filler is needed and providing support for the repair.
For structural repairs, particularly when the crack needs to resist movement, epoxy is often recommended due to its strong adhesive qualities and resistance to chemicals. A caulk gun can be utilized to inject the epoxy into the crack, ensuring deep penetration for a solid repair.
Understanding Concrete Properties
The properties of concrete such as elasticity, temperature expansion, and moisture resistance must be considered to match the repair material adequately. Concrete crack filler products are generally a blend of cement and sand, designed to mimic the expansion and contraction of the surrounding concrete to prevent further cracking. For hairline cracks, flexible sealants delivered via a caulk gun are ideal because they allow for natural movement without loss of adhesion.
When applying filler, tools like a putty knife help ensure a smooth, level finish with the adjacent surface. For deeper or larger cracks, preparing the mixture with a proper ratio of cement to sand is imperative, and sometimes additives are included to improve the performance of the mixture. A concrete backer rod installed in deep cracks prevents the repair material from sinking and provides a sound base to apply the repair material. One must always ensure that the material used for repair is compatible with the existing concrete and the specific demands of the project environment.
Repairing the Crack
When addressing concrete cracks, selecting the proper repair method is crucial. The size of the crack will determine the materials and approach needed for a successful fix.
Filling Small to Medium Cracks
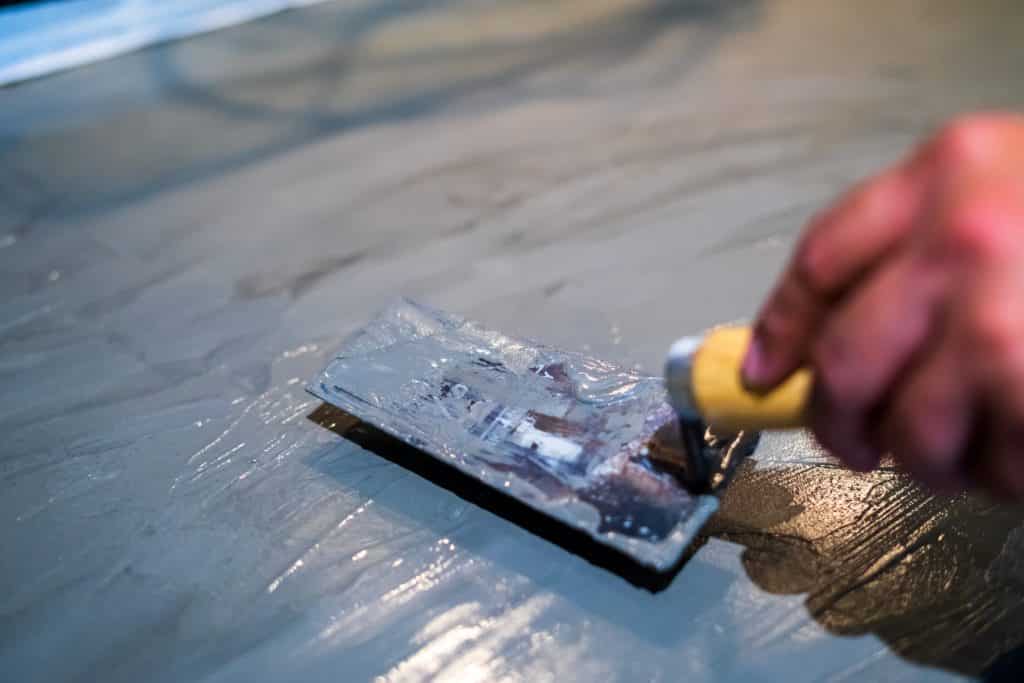
Small to medium cracks, considered to be less than a quarter-inch wide, can be effectively repaired using a liquid concrete repair kit. Ensure the crack is clean and free from debris before beginning. A caulking gun is typically used to inject repair material into the crack, filling it thoroughly. After application, it’s important to use a tool, such as a trowel or a putty knife, to smooth the surface. The repair should then be left to cure according to the manufacturer’s instructions, which usually specifies a certain time for the material to fully set.
- Materials Needed:
- Bucket
- Trowel or Putty Knife
- Liquid Concrete Repair Kit
- Caulking Gun
- Instructions:
- Clean the crack with a wire brush.
- Insert the tube of repair material into the caulking gun.
- Fill the crack with the repair material, ensuring it is slightly overfilled.
- Smooth the surface with a trowel.
- Allow the area to cure.
Addressing Large and Wide Cracks
For large and wide cracks, which are deeper or wider than a quarter-inch, a more robust approach is needed. Deep cracks likely require a backer rod before the repair material is applied to prevent sinking and to provide support. A concrete repair mix should be prepared in a bucket according to the product’s instructions. It is crucial to press the repair mix firmly into the crack and fill it to the surface level. Once filled, the surface must be leveled, and the curing process should be monitored closely, as larger repairs may take longer to set properly.
- Materials Needed:
- Bucket
- Trowel
- Concrete Repair Mix
- Backer Rod (for deep cracks)
- Instructions:
- Clean out the crack, removing any loose material.
- For deep cracks, insert a backer rod.
- Prepare the repair mix in a bucket.
- Press the mixture firmly into the crack until it is level with the concrete surface.
- Level the repair and let it cure as directed.
Finishing and Curing the Repair
Once the repair material has been applied, it is crucial to properly finish and cure the repair to ensure its longevity and strength. The following steps must be closely adhered to for optimal results.
Sealing and Protecting the Repair
After the concrete repair mix has set, one should apply a concrete sealer to protect the area from moisture intrusion and weather conditions. Using a pressure washer to clean the concrete surface ensures that the sealer adheres properly. Allow the area to completely let it dry before applying the sealer, which should be spread evenly across the surface to achieve a uniform gray color. This sealer acts as a barrier, preventing water absorption and protecting the repair from freeze-thaw cycles.
- Safety Equipment: Always wear gloves and a respirator while handling sealer to protect oneself from harmful fumes.
- Application: Apply sealer in a thin, even coat using a roller or spray equipment.
Curing Process and Precautions
The curing of the concrete is a critical stage that should not be rushed. Concrete reaches optimal strength when allowed to cure properly. During this phase, it’s essential to keep the newly repaired concrete moist for a minimum of 24 to 48 hours, depending on the product instructions. Dry weather can hasten the drying process, so one may need to dampen the area periodically.
- Curing Time: Allow adequate time for the repair mix to fully cure; refer to the manufacturer’s instructions for specifics.
- Timely Checks: Periodically inspect the concrete to ensure no cracks or issues emerge during the curing phase.
By following these steps with diligence and attention to detail, the repaired concrete will have the best chance at a long-lasting, durable finish.
Preventing Future Cracks
Ensuring the longevity and durability of concrete structures involves preventive measures and routine maintenance. This section outlines practical steps and considerations aimed at minimizing the likelihood of future cracks in concrete.
Addressing Root Causes
Climate: Extreme temperature changes can cause concrete to expand and contract, which may lead to cracks. Implementing seasonal protection strategies, including the use of sealants, can mitigate this risk.
Drainage: Poor drainage can undermine concrete foundations. It’s essential to ensure that all ground slopes away from the concrete structure to prevent water accumulation.
Tree Roots: The growth of tree roots near concrete can exert pressure and create cracks. They should plant trees at a safe distance from driveways, patios, and foundations to minimize this risk.
Professional Repair: When addressing cracked concrete, enlisting professionals ensures the correct diagnosis and repair methods. For structural issues in a concrete foundation or basement walls, a professional repair is not just recommended; it’s crucial.
Maintenance Tips
Regular Inspections: Perform thorough inspections periodically to catch hairline cracks early.
Gutters and Downspouts: Maintain gutters and downspouts to direct water away from the concrete structure, especially for basements and foundations.
Sprinklers: Position sprinklers to prevent water from pooling on driveways or patios.
Repair: For minor cracks, like those in a concrete driveway, use a concrete repair kit for a quick and easy fix. However, for larger issues, particularly outdoors, it is advisable to seek out repair services from skilled professionals.
By adhering to these guidelines, they safeguard their concrete surfaces against common causes of damage and extend their functional lifespan.