CALL US NOW
When it comes to installing tile, having a level surface is crucial for ensuring a successful and long-lasting installation. However, if your concrete subfloor is uneven or has imperfections, it can create challenges that may affect the final outcome of your tile project.
In such cases, leveling the concrete floor is necessary to create a smooth and even surface for tile installation. Leveling a concrete floor for tile installation involves preparing the surface and applying a leveling compound to smooth out any irregularities.
While this may seem like a daunting task, with the right tools and materials, it can be accomplished with relative ease. This article will provide a step-by-step guide on how to level a concrete floor for tile installation, from assessing the condition of your subfloor to checking for levelness and making final touches.
By following these steps, you can ensure that your tile installation will be both beautiful and durable.
Assessing the Condition of Your Concrete Subfloor
Prior to beginning the process of leveling a concrete floor for tile installation, it is essential to conduct a thorough assessment of the condition of the concrete subfloor. This step is necessary to ensure that the subfloor is strong, stable, and free of any cracks or imperfections. A subfloor that is not level can cause tiles to crack or become loose over time, which can lead to costly repairs.
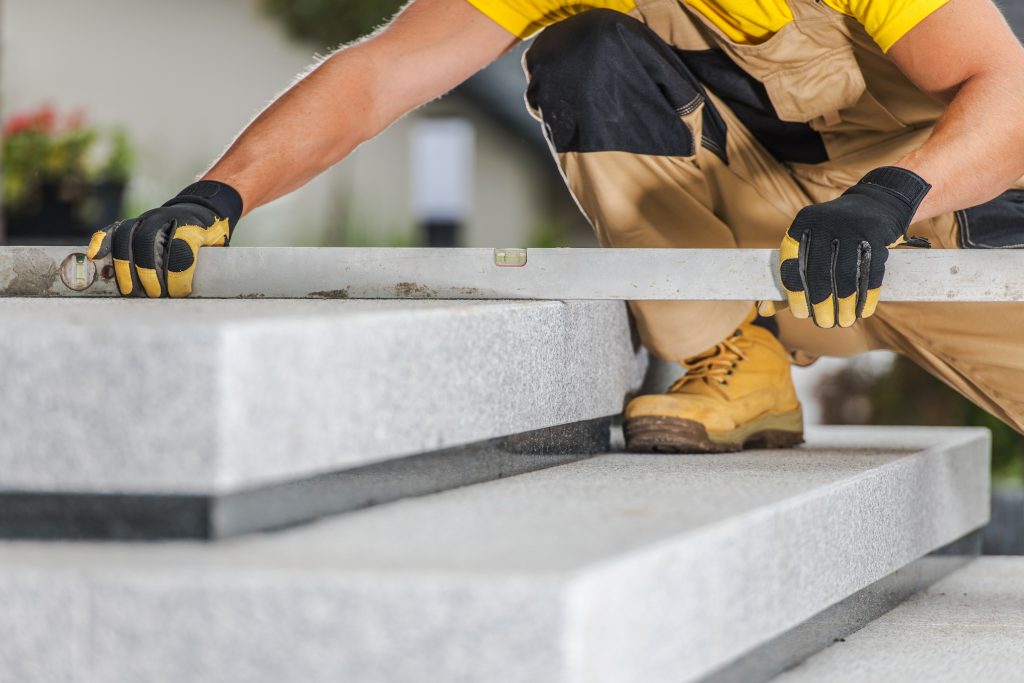
To assess the condition of your concrete subfloor, start by cleaning the surface thoroughly and removing any debris or loose material. Then, inspect the surface for any cracks or holes. If you find any, use a filler to repair them. It is important to note that the filler must be compatible with the existing concrete to ensure proper adhesion. Additionally, check for any unevenness or dips in the surface. You can use a straight edge or level to identify any areas that are not level.
Once you have assessed the condition of the concrete subfloor and made any necessary repairs, it is important to test the moisture level of the concrete. Excessive moisture can cause tiles to become loose or crack over time. To test the moisture level, tape a piece of plastic to the surface of the concrete and leave it for 24 hours. If you see moisture or condensation on the underside of the plastic, the concrete is too moist for tile installation.
In this case, a moisture barrier must be applied before proceeding with the leveling process.
Tools and Materials Needed for the Job
To successfully level a concrete floor for tile installation, it is essential to have the right tools and materials at your disposal. The following table lists some of the essential equipment and supplies that are needed for the job.
| Tools | Materials | Equipment |
| Leveling compound | Concrete grinder | Chalk line |
| Floor scraper | Trowel | Dust mask |
| Bucket | Measuring tape | Safety goggles |
| Mixing drill | Pry bar | Knee pads |
| Spirit level | Sandpaper | Rubber mallet |
The leveling compound is a crucial material that fills in any depressions and smoothens the surface of the concrete subfloor. The concrete grinder is used to remove any high spots and rough areas on the floor. Additionally, a floor scraper and pry bar are necessary for removing any stubborn adhesive, paint, or other debris that may be present on the surface.
When working with concrete, it is essential to take safety precautions seriously. A dust mask, safety goggles, and knee pads are necessary to protect your eyes, lungs, and knees from the dust and debris generated during the grinding and leveling process. A chalk line, measuring tape, and spirit level are also necessary to ensure that the floor is level and even throughout the entire area. By having the right equipment and materials, you can ensure that your concrete subfloor is correctly leveled, providing a solid foundation for your tile installation.
Preparing the Surface for Leveling Compound
One crucial step in ensuring a smooth and durable surface for tiling is to thoroughly clean and prepare the subfloor, which involves removing any dirt, debris, or adhesive residue. This is essential to ensure that the leveling compound can fully adhere to the subfloor and create a level surface.
The first step in preparing the surface is to sweep the area thoroughly with a broom and dustpan. This will remove any loose dirt or debris that can interfere with the bonding of the leveling compound.
Next, use a scraper or putty knife to remove any adhesive residue that may be present on the subfloor. This includes any glue or mortar that was used to install previous flooring. It is important to remove as much of this residue as possible to create a clean, smooth surface. If the adhesive is particularly stubborn, you may need to use a chemical adhesive remover to dissolve it. Be sure to follow the instructions carefully and use proper safety precautions when working with these chemicals.
After the surface has been thoroughly cleaned and any adhesive residue has been removed, it is important to check for any cracks or uneven areas in the subfloor. Use a straight edge or level to identify these areas, and mark them with a pencil. These areas will need to be filled in with a patching compound before the leveling compound can be applied.
By taking the time to properly prepare the subfloor, you can ensure that your tile installation will be smooth, level, and long-lasting.
Applying the Leveling Compound
After the subfloor has been thoroughly cleaned and any uneven areas have been patched, the next step in leveling a concrete floor for tile installation is applying the leveling compound. This is done to ensure that the surface is flat and even, allowing for a smooth and seamless tile installation.
It is important to note that the leveling compound should be applied only after the subfloor has been completely cleaned and allowed to dry completely.
The leveling compound is typically a self-leveling cement-based product that is mixed with water to form a smooth paste. It is important to follow the manufacturer’s instructions carefully when mixing the compound to ensure that it is the right consistency. The compound should be mixed until it is free of lumps and has a creamy consistency.
Once mixed, the compound should be poured onto the subfloor and spread evenly using a trowel or gauge rake. The thickness of the compound should be consistent throughout the surface to ensure that the tiles are laid down evenly.
After the leveling compound has been applied, it is important to allow it to dry completely before proceeding with the tile installation. The drying time can vary depending on the temperature and humidity in the room, but typically takes anywhere from 24 to 48 hours.
It is important to avoid walking on the compound while it is drying, as this can cause unevenness and compromise the integrity of the surface. Once the compound is completely dry, it is ready for tile installation.
Checking for Levelness and Final Touches
The final step in preparing the surface for tiling involves assessing the levelness of the floor and making any necessary adjustments, followed by applying any final touches to ensure a flawless finish.
The first step in checking the levelness of the floor is to use a long straightedge or level to assess the surface. Place the straightedge or level on the surface and check for gaps between the straightedge and the surface.
If there are any gaps, mark the areas that need to be filled in with leveling compound. Next, apply more leveling compound to the areas that need to be filled in, following the manufacturer’s instructions. Use a trowel to spread the compound evenly over the surface, smoothing it out as much as possible.
Allow the leveling compound to dry completely before proceeding with the final touches. Inspect the surface for any rough spots, bumps, or irregularities. Use sandpaper or a sanding block to smooth out any rough spots, and fill in any remaining gaps with a floor filler.
Once the surface is completely smooth and even, it is ready for tiling. By following these steps, you can ensure that your tiled surface is level and ready for use.
Frequently Asked Questions
Can I level a concrete floor without using a leveling compound?
Leveling a concrete floor without using a leveling compound may be possible, but it depends on the severity of the unevenness. If the floor is only slightly uneven, it may be possible to use a self-leveling concrete overlay to even out the surface.
However, if the unevenness is more significant, it may be necessary to grind down high spots and fill in low spots with a cementitious patching compound before applying the overlay. It is important to note that using a leveling compound can provide a more precise and even surface, which can be crucial for the success of tile installation.
Therefore, it is recommended to consider using a leveling compound if the floor is severely uneven.
How long do I need to wait before installing tiles after leveling the concrete floor?
After leveling a concrete floor, it is important to wait for a sufficient amount of time before installing tiles. The specific amount of time needed will depend on a variety of factors, such as the type of leveling compound used, the temperature and humidity of the room, and the thickness of the layer of compound.
In general, it is recommended to wait at least 24 hours before installing tiles on top of a leveled concrete floor. This will allow the compound to fully dry and cure, ensuring that it is strong and stable enough to support the weight of the tiles.
It is important to follow the manufacturer’s instructions for the specific leveling compound being used, as they may have different recommendations for curing times.
Can I use a self-leveling compound on a sloped concrete floor?
A self-leveling compound can be used on a sloped concrete floor, as long as the slope does not exceed the manufacturer’s recommended limit. Generally, most self-leveling compounds can handle slopes up to 1/4 inch per foot, but this can vary depending on the specific product.
It is important to properly prepare the surface before applying the self-leveling compound, which may include cleaning, priming, and filling any cracks or gaps. Additionally, it is important to follow the manufacturer’s instructions for mixing and applying the compound, as improper application can result in an uneven surface.
In general, using a self-leveling compound can be a quick and effective solution for leveling a sloped concrete floor in preparation for tile installation.
Is it necessary to remove the existing tiles before leveling the concrete floor?
Removing existing tiles before leveling a concrete floor depends on the condition of the tiles. If the tiles are in good condition with no cracks or damage, they can be left in place and used as a base for the self-leveling compound.
However, if the tiles are damaged or cracked, they need to be removed before leveling the floor to ensure a smooth and even surface. It is important to note that if the tiles are not removed, the self-leveling compound may not adhere properly, resulting in an uneven and unstable surface.
Therefore, it is recommended to assess the condition of the existing tiles before deciding whether to remove them or not.
Can I level a concrete floor that has cracks or uneven areas?
Leveling a concrete floor that has cracks or uneven areas is possible, but it requires a different approach compared to leveling a uniformly uneven floor.
To level a floor with cracks or uneven areas, it is necessary to first fill in the cracks and low spots with a suitable concrete patching compound or self-leveling compound.
It is important to ensure that the patching compound is fully cured before proceeding with the leveling process.
Once the patches are cured, the floor can be leveled using a self-leveling compound that is specifically designed for uneven concrete surfaces.
It is essential to follow the manufacturer’s instructions for mixing and applying the compound to ensure that it is spread evenly and does not create more unevenness.
After the self-leveling compound has dried, the surface should be smooth and level, ready for tile installation.
Conclusion
In conclusion, leveling a concrete floor for tile installation requires precision and attention to detail. It is essential to assess the condition of the subfloor thoroughly and gather all necessary tools and materials before beginning the job.
Preparing the surface for the leveling compound is crucial to ensure the compound adheres correctly. The application of the leveling compound requires patience and careful monitoring to avoid any errors that may compromise the quality of the job.
In a way, leveling a concrete floor is like sculpting a piece of art. It requires a steady hand, a sharp eye, and a clear vision of the final product.
Just as a sculptor carves away at a block of marble to reveal a beautiful sculpture, leveling a concrete floor requires removing any imperfections to create a smooth and level surface.
With the right tools and techniques, the end result can be a masterpiece that will stand the test of time.