Concrete steps are a durable and long-lasting feature for any home, providing a sturdy means of access to entrances. However, over time, these steps can begin to pull away from the house, creating not only an eyesore but also a potential safety hazard. Repairing concrete steps is a task that homeowners can often undertake as a do-it-yourself project, with the right guidance and a focus on safety. Acknowledging the complexity of the repair process is vital to ensure a successful restoration that stands the test of time.

The detachment of concrete steps from a house can be the result of various issues, ranging from soil erosion to seasonal temperature fluctuations causing expansion and contraction of materials. Before beginning any repair, it is critical to understand the underlying cause of the separation to prevent future occurrences. Addressing the root problem helps in achieving a more permanent solution, and using proper techniques and materials is essential for a secure bond between the steps and house.
Initiating the repair process involves cleaning the area thoroughly and preparing it for the application of bonding agents or new concrete. The appropriate selection of materials, such as a high-quality concrete bonding adhesive, is essential for the new concrete to adhere correctly to the existing steps. Adhering closely to product instructions and allowing adequate curing time are steps that cannot be compromised, ensuring the longevity of the repair and the continued safety and integrity of the concrete steps. To gain a more detailed understanding of the process, homeowners seeking to repair their own concrete steps can benefit from step-by-step instructions and expert tips.
Assessing the Damage

Before undertaking repairs, it is crucial to thoroughly assess the damage to the concrete steps. This evaluation will determine the repair process’s scope and the materials required for a successful restoration.
Identify Structural Damage
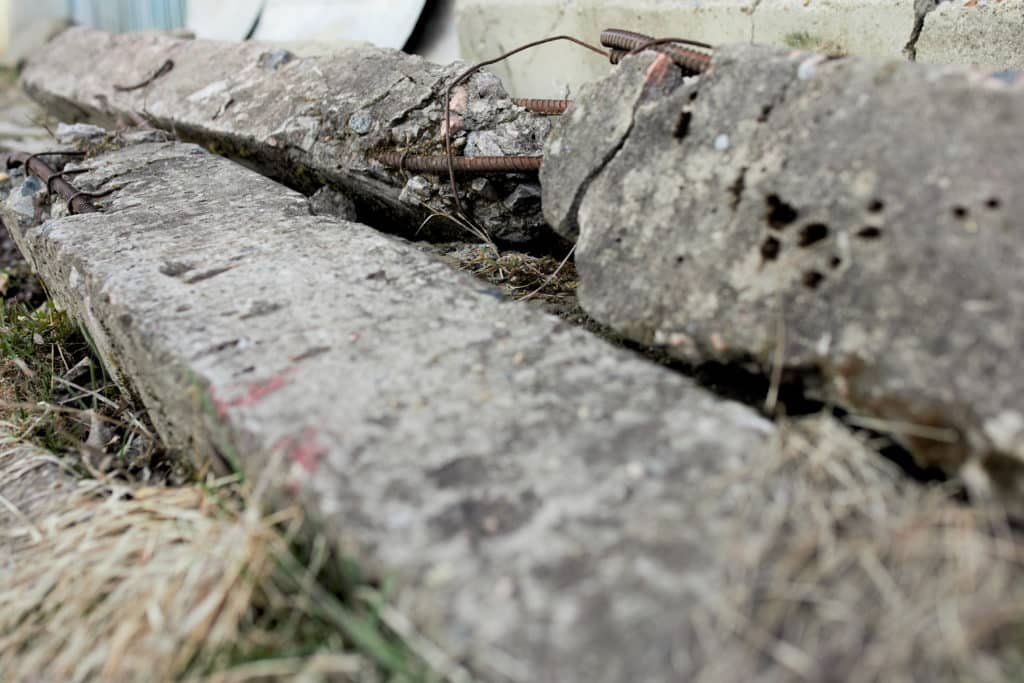
The first step in assessing damage is to evaluate any structural issues. Structural damage may include significant cracks running through the steps, or steps that have begun to separate from the house foundation—both indicators of potential stability concerns. One should carefully examine corners and edges, as these areas are susceptible to chipping and may compromise the steps’ integrity if left unaddressed.
Spot Surface Deterioration
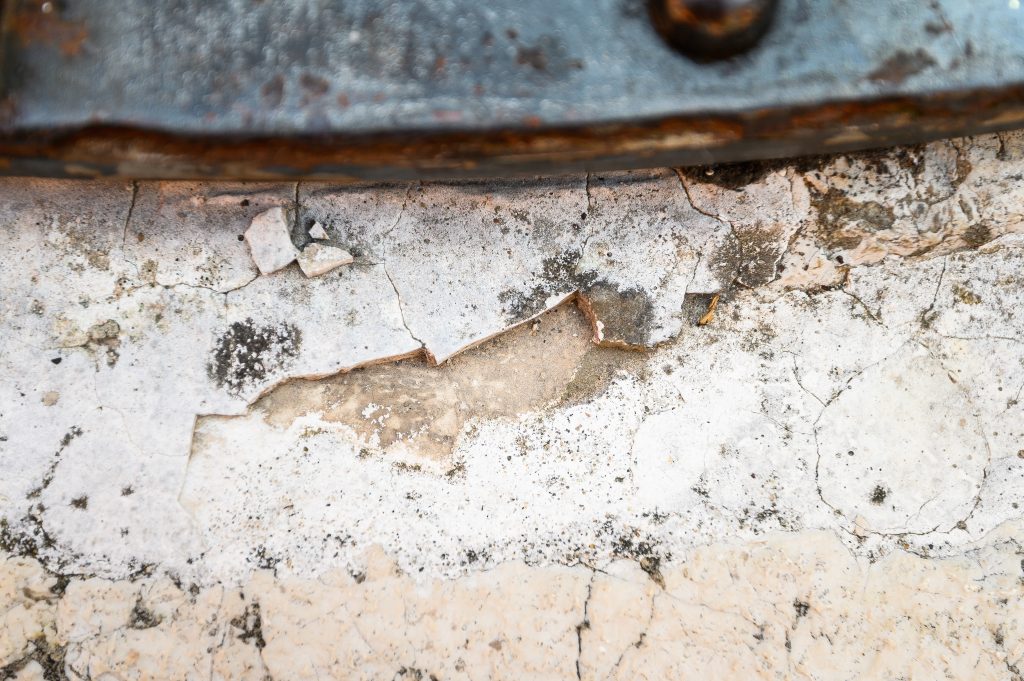
Surface deterioration includes flaking or spalling of the concrete, visible signs that the steps have been exposed to weathering and possible water damage. The surface may exhibit small pits, or larger areas might be chipped away. Paying particular attention to the corners and other high-stress points is important, as these can become dangerous if the concrete crumbles and loosens further.
Preparing for the Repair

Before initiating the repair of concrete steps pulling away from a house, one must prepare the work area and collect the necessary tools and materials. This proactive approach ensures safety and lays the groundwork for a successful repair.
Gather Necessary Tools and Materials
To begin with, one should assemble all the required tools and materials to avoid interruptions during the repair process. Essential items include:
- Brush: For cleaning the debris.
- Wire Brush: To scrub away smaller particles and dirt.
- Chisel: To dislodge any loose concrete fragments.
- Hammer: For use with the chisel and to help in breaking detached concrete.
- Bucket: Necessary for mixing repair materials or holding cleaning tools.
- Safety Gear: Safety glasses and a dust mask are crucial to protect oneself from concrete dust and debris.
Clean the Area Thoroughly
Cleaning the damaged area must be thorough. Here are the steps one should follow:
- Use a brush to sweep away the larger debris.
- Wire brush the surface to remove finer particles.
- Employ a shop vac if available or a rag to wipe down and collect the remaining dust.
- Ensure that no dirt or debris remains, as this could hinder the adherence of repair materials.
Remove Loose Concrete
Safety is paramount here. One must:
- Put on safety gear, including gloves and a mask.
- Use the chisel and hammer in tandem to chip away and remove any loose or damaged concrete from the steps.
- Brush away resultant debris to leave a solid, clean base for the repair compound.
Executing the Repair

In repairing concrete steps that have pulled away from a house, precision and the proper materials are key. It’s essential to use a quality concrete patch, ensure corners and edges are rebuilt correctly, and to secure proper adhesion throughout the process.
Mix and Apply Concrete Patch
To begin the patching process, one must prepare a concrete patch mix to the consistency of peanut butter using quick-setting concrete. Wearing gloves, a masonry brush should first be utilized to apply concrete bonding adhesive to the existing concrete for increased adhesion. Immediately after, using a pointed trowel, the mixed concrete patch is applied firmly to the areas in need of repair, ensuring to press the mixture into the crack or area being patched.
Rebuild Corners and Edges
Corners and edges tend to bear the brunt of weathering and use. To reconstruct these areas, form the quick-setting concrete patch into the precise shape needed, using duct tape as a temporary framing if necessary. A rubber float or a trowel can then be used for sculpting and smoothing the concrete to achieve the right edges and surface that is flush with the original steps.
Ensuring Proper Adhesion
For patching to last, ensuring proper adhesion is crucial. Before the patched areas dry, go over them with a float or trowel to create a texture that matches the existing concrete surfaces. Finish by applying a concrete sealer with a paintbrush, which aids in water resistance and preservation of the repair. Allow adequate drying time as directed by the product instructions to ensure the repair sets securely.
Finalizing the Repair

Once the structural repair of concrete steps pulling away from a house is completed, it is critical to finalize the repair with careful attention to surface finishing, curing, and sealing. This aids in ensuring the longevity of the repair and the overall integrity of the steps.
Surface Finishing and Texturing
After the concrete resurfacer has been applied, it is important to evenly level the surface using a steel trowel for a smooth finish. A concrete edger can be used to shape the edges and corners for a professional look. For added traction and to match the existing concrete, texturing should be done while the concrete is still pliable. One can drag a broom across the surface to create a non-slip finish or use a sponge for a lighter texture.
Curing and Sealing
Curing is crucial for the strength and durability of concrete repairs. Steps should be kept damp for a minimum of 24 hours to ensure proper hydration of the cement. This can be achieved by covering the steps with a wet cloth or a plastic sheet, which helps maintain the right temperature and moisture levels during the curing process. After curing, applying a concrete sealer with a paintbrush or roller will help protect against weathering and traffic, extending the life of the concrete steps.
Apply Protective Coating
Finally, to provide an additional layer of protection, a concrete sealer should be applied. This not only seals the surface against moisture and damage, but also enhances the appearance. The sealer should be chosen based on the expected traffic and exposure conditions the steps will face. A long-handled roller or paintbrush can be used to apply the sealer, and applying it in two thin coats is often more effective than one thick coat. One should follow the manufacturer’s recommended drying times between coats and before allowing foot traffic on the surface.
Maintenance Tips
Maintaining concrete steps is crucial to ensure their longevity and safety. Proper maintenance involves regular cleaning, thorough inspection, and promptly addressing any minor issues that may arise.
Regular Cleaning and Inspection
Regular cleaning: It is important to keep the concrete stairs free from debris, dirt, and buildup. One should sweep the steps weekly and perform a more thorough cleaning monthly using a mild detergent and a stiff brush.
- Weathering Protection: Applying a high-quality concrete sealer every few years can protect the stairs from weathering, water damage, and stains.
- Inspection: A visual inspection should be done seasonally to check for signs of wear like cracks or chips in the concrete. Special attention should be paid before and after heavy traffic periods or extreme weather conditions.
Immediate Action on Minor Issues
Prevention: When minor issues such as small cracks or chips are identified, immediate action can prevent further damage. Filling these minor defects quickly helps maintain structural integrity.
- Protection Measures: For areas with severe temperatures or high precipitation, taking additional protective measures such as installing awnings or snow melting systems can extend the lifespan of concrete stairs.
- Traffic Considerations: Areas with high foot traffic may require more frequent inspections and proactive maintenance to prevent hazards and deterioration.
By following these tips, one can keep concrete steps in top condition and prevent costly repairs in the future.

 CALL US NOW


