CALL US NOW
Cracks in concrete are a common issue for homeowners and property managers. They often result from a variety of factors such as weather changes, subsoil shifts, and the passage of time. Even though concrete is a durable material, it’s not immune to the forces of nature and everyday wear and tear. Left unchecked, small cracks can lead to bigger problems, including structural damage, water infiltration, and aesthetic deterioration.
Addressing cracks in concrete promptly is important to maintain the integrity and appearance of the surface. The process of repairing concrete may vary depending on the size and severity of the cracks. Simple, hairline fractures can often be fixed by homeowners with basic tools and materials, while larger cracks may require a more thorough approach and professional help.
Repairing concrete isn’t just about fixing visible issues but also about preventing future damage. Using the right techniques and materials is crucial for ensuring a lasting repair. By understanding how to assess the cracks and execute repairs effectively, property owners can protect their investment and keep their concrete surfaces safe and functional for years to come.
Identifying Types of Concrete Cracks
Before attempting repairs, it is crucial to understand the nature of concrete cracks. Classification of the cracks can inform the repair method.
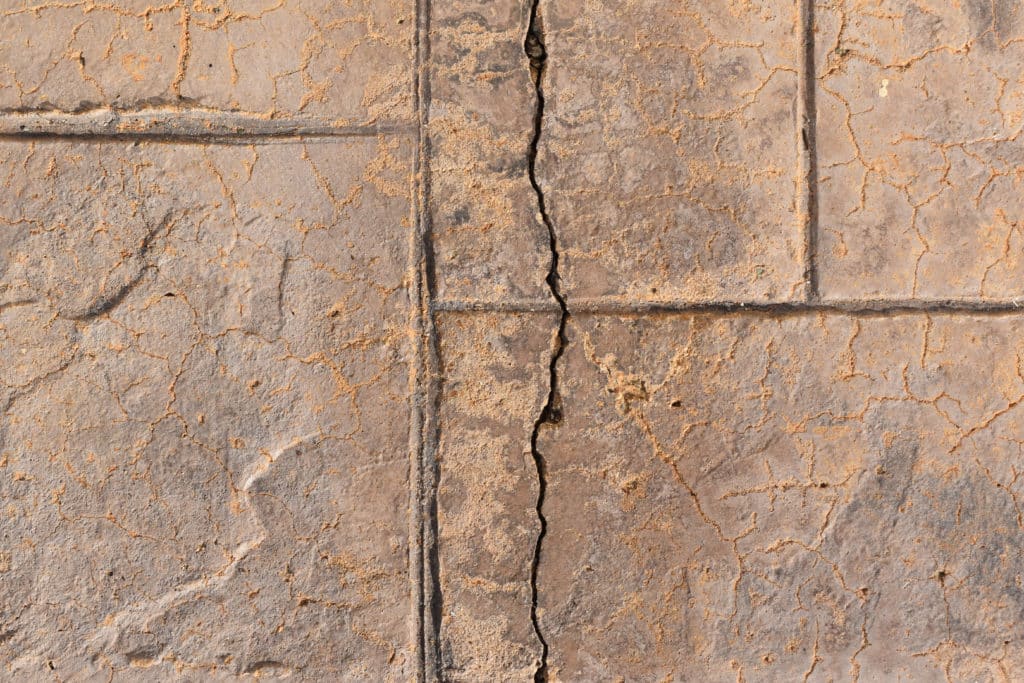
Analyzing Hairline and Narrow Cracks
Hairline cracks are fine surface breaks that often appear in concrete as it cures. These narrow cracks are typically less than 1/8 inch wide and may not significantly impact structural integrity. However, they can lead to further damage if ignored. They should be monitored for changes in width or length over time.
- Visual Inspection: Check for continuity, whether the hairline cracks are localized or run throughout the structure.
- Potential Causes: Could result from shrinkage, thermal changes, or curing stages.
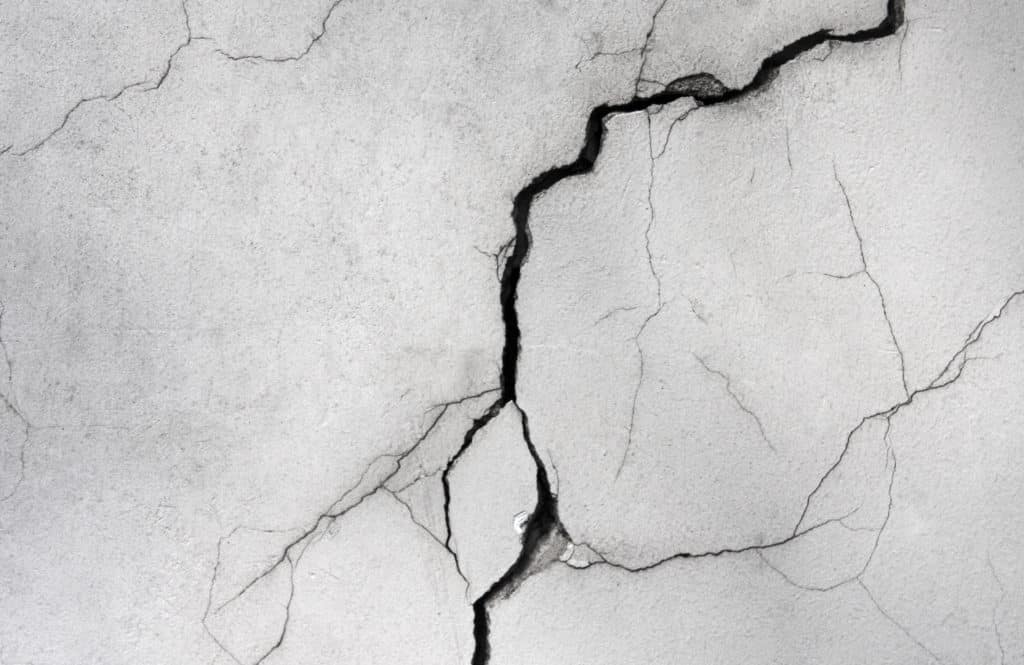
Assessing Large and Structural Cracks
Large cracks in concrete, those wider than 1/4 inch, can be symptomatic of deeper issues and might affect the structural integrity of the concrete element. It is important to assess these cracks to determine if they are active or dormant.
- Active vs. Dormant: Active cracks continue to develop and indicate ongoing issues. Dormant cracks remain unchanged over time.
- Horizontal Crack: A horizontal crack in a wall or slab may signal lateral pressure or thermal expansion issues.
Measurements: Record the width, length, and depth of large cracks with precision instruments to track any changes over time.
- Depth Gauge: Use to measure crack depth and determine if it penetrates through the slab.
- Crack Gauge: A device to monitor crack width changes, important for evaluating the stability of the crack.
Preparing the Crack for Repair

Before starting the repair, it is essential that the concrete crack is prepped properly. Good preparation ensures that the repair materials will adhere correctly and the fix will be long-lasting.
Cleaning the Crack Surface
The first step in preparing a crack for repair is to ensure the crack’s surface is clean. One should use a wire brush to vigorously scrub the crack, removing any dust, dirt, or residues. For more stubborn areas, a pressure washer could be employed, but care must be taken not to exacerbate the crack. After brushing, it is useful to rinse the area with clean water to ensure all loose materials are cleared away.
Removing Debris and Loose Material
Once the surface has been cleaned, the focus moves to the crack itself. Using a trowel or similar tool, one should remove all debris and loose material from within the crack. For finer particles, a shop vac or vacuum proves helpful to suction out dust and small pieces that the trowel may not catch. It’s important that the crack be as clean as possible to allow the repair material to bond effectively, providing a durable and stable repair.
Selecting the Right Repair Materials

When dealing with concrete cracks, the selection of suitable repair materials is crucial to ensure a durable fix. There’s a variety of fillers and sealers available, each designed for specific types of cracks and concrete conditions.
Understanding Crack Fillers and Sealer Options
Concrete cracks can be addressed with several products, ranging from concrete crack fillers to sealers. Concrete crack fillers are usually a polymer-based compound designed to expand and contract with the crack, providing a more permanent solution. They come in a range of viscosities; some are suitable for narrow hairline cracks while others are better for larger fissures. On the other hand, sealers are applied to the surface of the concrete to prevent further moisture penetration and protect the material. For outdoor concrete surfaces, a sealer can also provide UV protection to the repaired area.
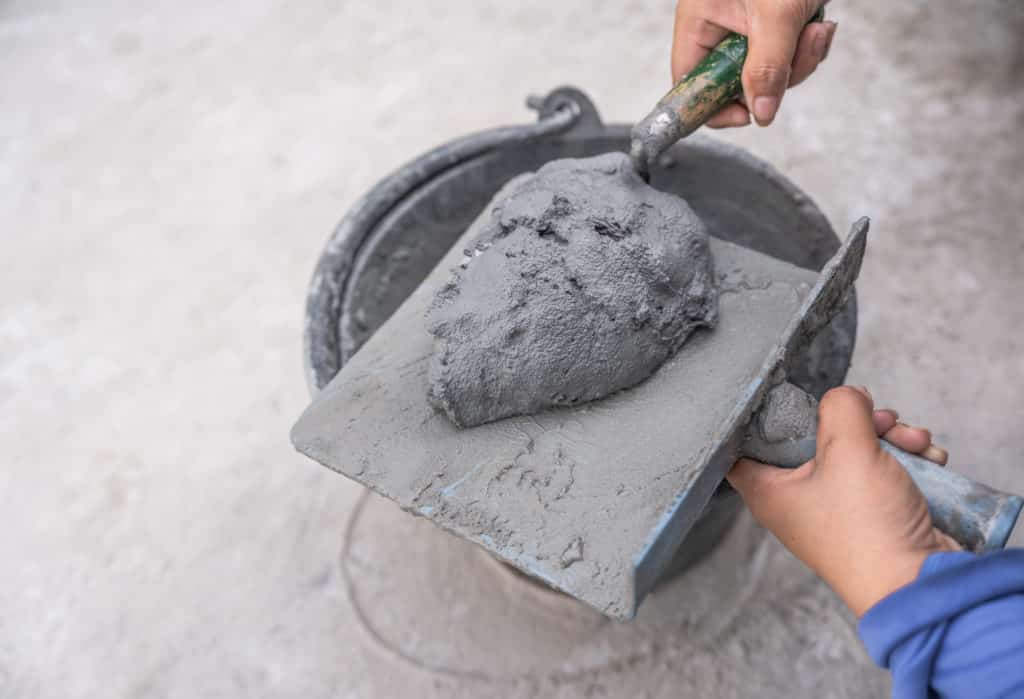
Mixing Concrete Repair Compounds
The preparation of concrete repair compounds typically involves the mixing of a cement-based powder with water or a polymer additive to create a strong, bonding mixture. It’s important to follow manufacturer-specific mixing ratios to achieve the best results. When mixing, one should aim for a homogeneous consistency that can be applied easily into the crack and will adhere to the old concrete without shrinking or cracking itself. Epoxy compounds are a common choice for their strength and endurance, and many find them useful for cracks that must bear heavy loads or are located in areas of high traffic.
Executing the Repair Process
Before initiating any concrete crack repair, it’s essential to identify the right materials and tools for the job. Utilizing a putty knife or a chisel and hammer, one can prepare the crack for filling. A liquid concrete repair kit and a caulk gun will then aid in applying the repair material competently.
Applying the Filler and Sealing
- Preparing the Crack: Erode any loose material with a chisel and hammer, then remove the debris to clear the crack.
- Filling the Crack: For wider cracks, insert a backer rod into the void before applying the filler. This provides a base for the repair material.
- Sealing: Use a caulk gun equipped with a tube of concrete repair sealant. Fill the crack completely, ensuring that the sealant is applied evenly. Smooth the surface with a putty knife to level the sealant with the surrounding concrete.
Curing and Finishing Touches
- Curing the Repair: Allow ample time for the sealant to cure according to the manufacturer’s instructions. Curing is critical for the durability and strength of the repair.
- Finalizing the Surface: Once the repair is cured, inspect the surface for any irregularities. If needed, sand the repaired area with a coarse grit sandpaper to achieve a smooth finish.
By carefully following these steps, one can execute basement wall crack repair with a level of expertise that ensures the structural integrity and extends the lifespan of the concrete surface.
Preventing Future Cracks
A crucial component of concrete longevity is taking proactive measures to prevent cracks from developing. By addressing water and tree root issues and maintaining and sealing concrete surfaces, one can significantly reduce the chances of cracking.
Managing Water and Tree Root Issues
Moisture is a primary culprit in concrete degradation. To safeguard against water damage, ensure that gutters and downspouts are properly installed and directed away from concrete areas like driveways and patios. It’s essential to maintain a dry foundation for concrete to prevent weakening and cracking.
- Install:
- Gutters with sufficient capacity
- Downspouts directing water at least five feet away from concrete
Additionally, tree roots can cause significant damage as they grow underneath concrete surfaces. If planting new trees near a concrete area, choose species with non-invasive roots or implement root barriers to divert growth away from concrete structures.
- Preventive Measures for Roots:
- Select trees with slow-growing, less invasive root systems
- Install root barriers between trees and concrete surfaces
Maintaining and Sealing Concrete Surfaces
The surface integrity of concrete plays a pivotal role in its resilience. Regularly clean and inspect concrete surfaces for early signs of wear and tear. Address minor cracks quickly to prevent them from expanding.
- Maintenance Tips:
- Periodically power wash to remove dirt and debris
- Fill in small cracks immediately with a suitable concrete repair mix
Applying a high-quality sealer provides a waterproof barrier that protects concrete from moisture intrusion, chemicals, and corrosive elements. Sealing is an important step for areas exposed to the elements, and it’s recommended to reapply sealer as specified by the product manufacturer.
- Sealing Steps:
- Clean the concrete thoroughly before application.
- Apply sealer evenly across the concrete surface, following the manufacturer’s instructions.
By focusing on moisture management through effective drainage and tree growth control, as well as routine maintenance and sealing, one can maintain the structural integrity of concrete and extend its usable life.